
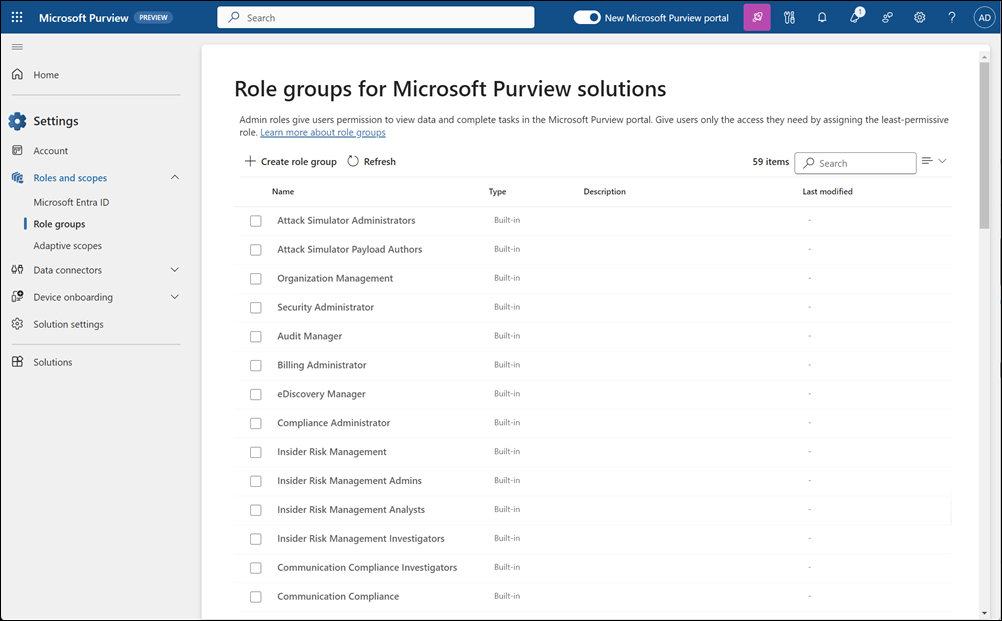
The Microsoft Purview portal lets administrators centrally manage permissions for users who work with compliance, data security, data governance, and risk solutions.
Using Roles and Scopes in the portal, you can grant people only the access they need—nothing more.
To view or manage role groups, a user must be:
- A Global Administrator, or
- Assigned the Role Management role (available only through the Organization Management role group)
Principle of Least Privilege
Always assign the lowest level of access needed for someone to perform their duties.
Avoid giving Global Administrator to more people than necessary.
This approach:
- Reduces risk
- Minimizes accidental changes
- Improves overall security posture
How Permissions Work in Purview (RBAC Model)
Purview uses Role-Based Access Control (RBAC)—similar to other Microsoft 365 services.
This means:
- You assign roles to users
- Roles are grouped into role groups
- Role groups grant the ability to perform tasks inside Purview
Note: Some services require separately managed permissions (e.g., Exchange MRM, auditing). Those must still be assigned in their own admin centers.
For solution‑specific permission guidance
Here are the links to each category (keep as-is):
- Adaptive Protection – Insider Risk Management
- Administrative Units
- Audit
- Collection Policies
- Communication Compliance
- Compliance Manager
- Data Classification (Activity Explorer, Content Explorer, Data Explorer)
- Data Governance – Unified Catalog
- Data Governance – Classic Data Catalog
- Data Lifecycle Management
- Data Loss Prevention
- Data Security Investigations
- Data Security Posture Management
- Data Security Posture Management for AI
- Device Onboarding
- eDiscovery
- Information Barriers
- Insider Risk Management
- Privileged Access Management
- Records Management
- Triage Agent (DLP, Insider Risk)
- Security Copilot for Purview
- Sensitive Information Types – Custom
- Sensitive Information Types – Exact Data Match
- Sensitivity Labels
To view default role groups and their assigned roles:
Roles and role groups in Microsoft Defender XDR and Microsoft Purview portals
Roles, Role Groups & Members — How They Relate
- A role = permission set (e.g., Case Management)
- A role group = several roles bundled together to match job functions
- A member = user or group you add to a role group
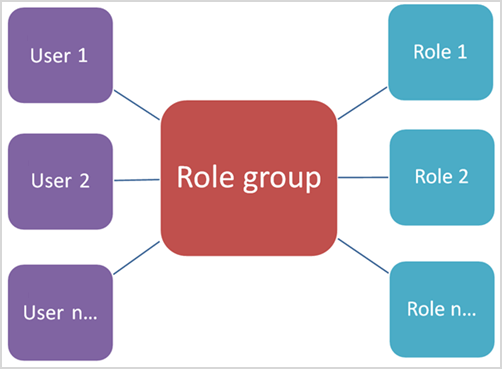
Role groups allow administrators, analysts, investigators, or auditors to get the right level of access across Purview solutions.
Microsoft Entra Roles in Purview
In the Roles and Scopes area, Global Administrators can also view Microsoft Entra roles (formerly Azure AD roles).
These roles align with common IT job functions.
To modify Entra role membership, Purview links to the Azure portal.
Examples of available Entra roles
| Role | What it’s for |
|---|---|
| Attack Payload Author | Create attack payloads (not launch them) |
| Attack Simulation Administrator | Create, schedule, launch, and review attack simulations |
| Compliance Administrator | Manage compliance requirements, eDiscovery, and governance settings |
| Compliance Data Administrator | Track and protect data across Microsoft 365 |
| Global Administrator | Full access across all Microsoft 365 services |
| Global Reader | Read‑only access across all admin areas |
| Security Administrator | Manage security policies and view security reporting |
| Security Operator | Investigate and respond to security threats |
| Security Reader | View security information but cannot perform actions |
Managing Purview Role Groups
Add Users or Groups to a Role Group
- Sign in to the Purview portal with a Role Management‑assigned admin account.
- Go to Settings → Roles and scopes → Role groups.
- Select a role group → Edit.
- Choose users or groups to add. Note: Security group support applies only to commercial Microsoft 365 tenants.
- Select the users/groups.
- If needed, assign admin units.
- Select Next → Save → Done.
Remove Users or Groups
- Go to Settings → Roles and scopes → Role groups.
- Open the role group → Edit.
- Check the members to remove.
- Select Remove members → Next.
- Select Save → Done.
Create a Custom Role Group
- Go to Settings → Roles and scopes → Role groups.
- Choose Create role group.
- Name and describe the group.
- Add roles.
- Add users or groups.
- Assign admin units if needed.
- Review → Create.
Update a Custom Role Group
- Open the custom role group → Edit.
- Update the description.
- Add or remove roles.
- Add or remove members.
- Modify admin units if required.
- Review → Save.
Delete a Custom Role Group
- Open the role group in Settings → Roles and scopes.
- Select Delete.
- Confirm the deletion.